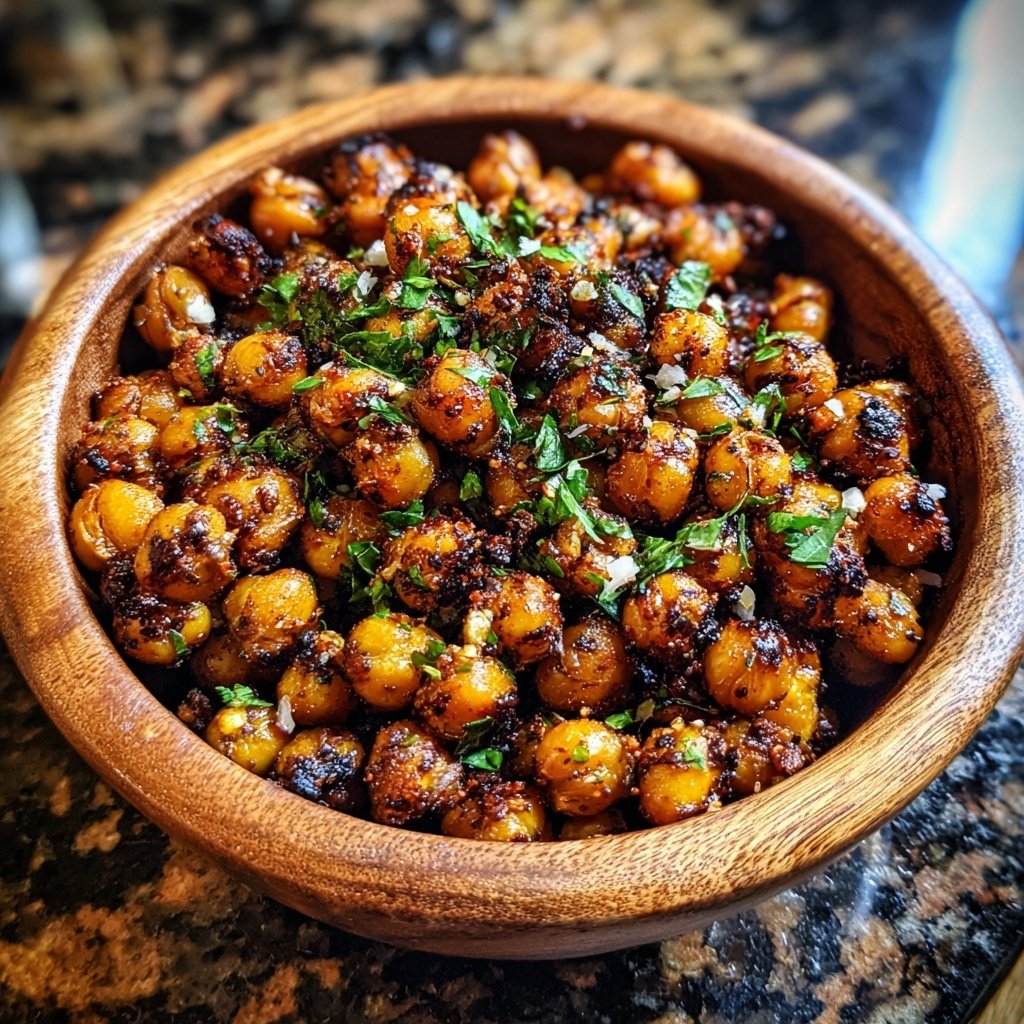
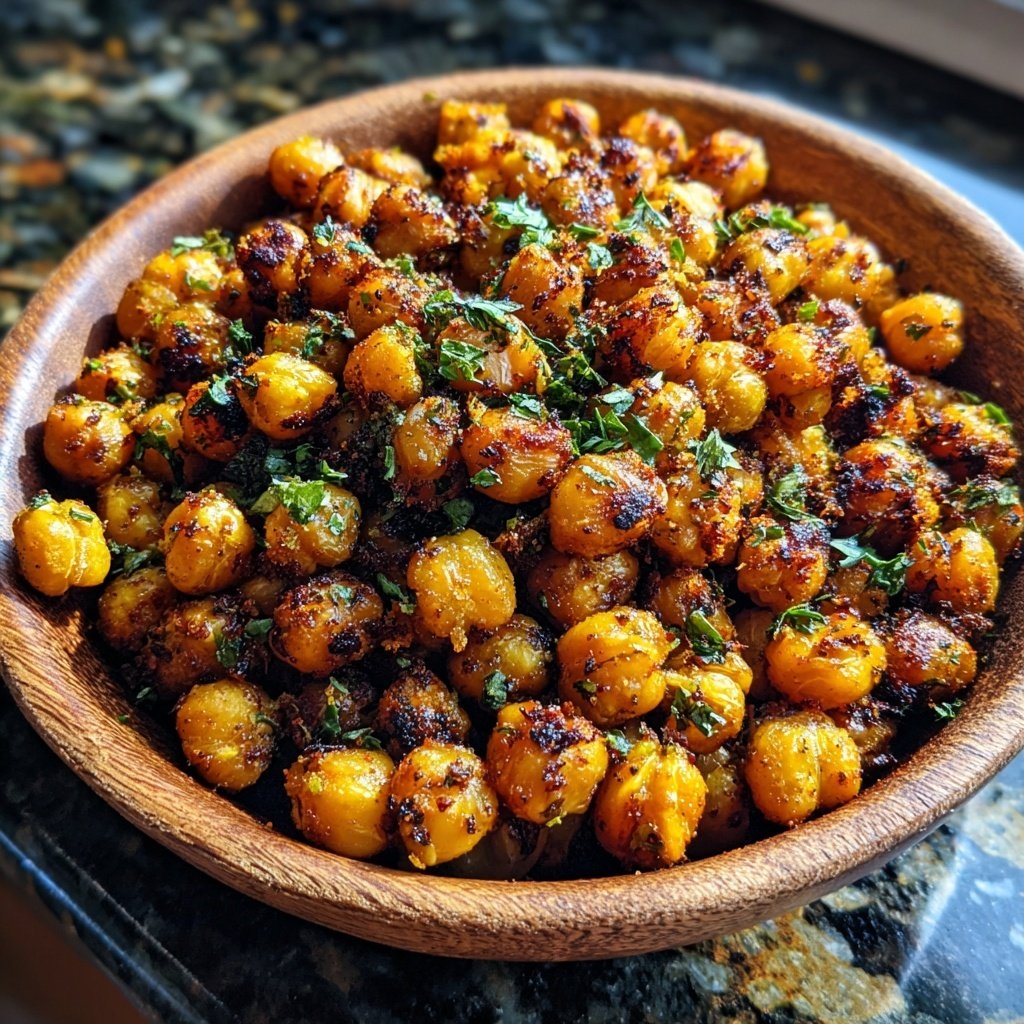
Garlic Roasted Chickpeas
Highlighted under: Natural Collection
I love making Garlic Roasted Chickpeas for a quick and nutritious snack. The combination of crunchy chickpeas and savory garlic creates an addictive flavor that is hard to resist. Whether I'm enjoying them solo or serving them at a gathering, they never fail to impress. It's a simple recipe that transforms canned chickpeas into a crunchy, flavorful treat. With just a handful of ingredients and some patience, I find that these roasted chickpeas are my go-to snack for any occasion.
When I first tried roasting chickpeas, I was amazed by how such a simple ingredient could become something so satisfying. I remember experimenting with various spices, but garlic quickly became my favorite. Its aroma fills the kitchen and lingers, tempting everyone around. I also discovered that using a high temperature during roasting not only gives them a lovely crunch but also intensifies the flavor of the garlic.
Over time, I learned some key tips to make them even better. For instance, soaking the chickpeas before roasting helps them get extra crispy. I've also started adding a pinch of cayenne for some heat, which elevates the flavor profile wonderfully. These little tricks keep my friends asking for more!
Why You Will Love This Recipe
- Irresistible crunch with every bite
- Savory garlic flavor that enhances your palate
- Perfect for snacking or as a salad topping
Getting the Perfect Crunch
To achieve that irresistible crunch with your garlic roasted chickpeas, it's crucial to dry them thoroughly after rinsing. Excess moisture can prevent them from becoming crispy. I often let them sit on the towel for about 15 minutes before patting them down. You’ll know they’re ready when they feel slightly tacky to the touch but no longer wet. This small step really impacts the texture of the final product.
Another key point is the thickness of your olive oil coating. Use enough oil, about 2 tablespoons for two cans of chickpeas, to ensure every single chickpea is evenly coated. This allows for even roasting, bringing out the natural nutty flavor while enhancing the garlic seasoning. If you prefer to cut back on oil, you can use a spray bottle to mist the chickpeas lightly, just be sure to keep an eye on their roasting time.
Seasoning Variations and Additions
While this recipe emphasizes garlic and paprika, don’t hesitate to play around with flavors. For a Mediterranean twist, consider adding a teaspoon of dried oregano or thyme. You can also switch the paprika for smoked paprika for a deeper flavor profile. I love the added warmth it brings to the dish, making them perfect for autumn snacking. Incorporating citrus zest, like lemon or lime, can accentuate the garlic while adding a bright note.
If you're looking to add protein, consider mixing in some nutritional yeast before roasting. This will give your chickpeas a cheesy flavor without dairy. Alternatively, a sprinkle of grated Parmesan after roasting can take them to a whole new level of delicious. Just be careful with the salt content in this case, as cheese can add extra saltiness.
Ingredients
Gather the following ingredients to make delicious Garlic Roasted Chickpeas:
Ingredients
- 2 cans (15 oz each) chickpeas, drained and rinsed
- 2 tablespoons olive oil
- 4 cloves garlic, minced
- 1 teaspoon paprika
- 1 teaspoon salt
- 1/2 teaspoon black pepper
- Pinch of cayenne pepper (optional)
Once you have all your ingredients ready, you're just a few steps away from enjoying your snack!
Instructions
Follow these simple steps to create your Garlic Roasted Chickpeas:
Prepare the Chickpeas
Preheat your oven to 400°F (200°C). Spread the rinsed chickpeas on a clean kitchen towel and pat them dry. It’s important to remove excess moisture for the best crunch.
Season
In a mixing bowl, combine the dried chickpeas, olive oil, minced garlic, paprika, salt, black pepper, and cayenne pepper (if using). Toss well to ensure the chickpeas are evenly coated.
Roast
Spread the chickpeas on a baking sheet in a single layer. Roast in the preheated oven for 25-30 minutes, stirring halfway through, until they are golden brown and crunchy.
Cool and Serve
Once roasted, remove the chickpeas from the oven and let them cool for a few minutes. Enjoy as a snack or toss them on salads for added crunch!
And there you have it! Your Garlic Roasted Chickpeas are ready to be enjoyed.
Pro Tips
- For an extra burst of flavor, try using garlic powder along with minced garlic, or experiment with your favorite spices like cumin or rosemary.
Storage and Make-Ahead Tips
These garlic roasted chickpeas are best enjoyed fresh for that optimal crunchy texture. However, if you have leftovers, store them in an airtight container at room temperature. They can stay crunchy for up to 3 days, but I find they begin to lose their snap after about a day due to moisture in the air. To revive them, simply re-roast them in a 400°F (200°C) oven for about 5-10 minutes to restore their crunchiness.
If you’d like to prepare them ahead of time, consider roasting a big batch on the weekend. They make for an easy snack throughout the week. Just be sure to let them cool completely before sealing them in a container to avoid steaming and softening. For longer storage, you can freeze them spread out on a baking sheet and, once frozen solid, transfer them to a freezer bag. When you’re ready to enjoy, roast them straight from the freezer.
Serving Suggestions
Garlic roasted chickpeas serve as a perfect snack on their own, but they can also enhance various dishes. Try tossing them onto a mixed salad for an added crunch or sprinkle them over soups for texture. They elevate a simple dish to restaurant-quality in no time. Pair them with hummus or a yogurt dip for a satisfying appetizer that guests will love.
If you're feeling adventurous, blend them into a chickpea salad with diced vegetables and a light dressing as a nutritious lunch option. You might also consider incorporating them into grain bowls, providing both crunch and protein. The versatility of these roasted chickpeas means they can fit seamlessly into many meals or occasions!
Questions About Recipes
→ Can I use dried chickpeas instead of canned?
Yes, but you will need to soak and cook them before following the roasting steps.
→ How do I store leftover roasted chickpeas?
Store any leftovers in an airtight container at room temperature for up to 3 days.
→ Can I make these chickpeas ahead of time?
Absolutely! You can roast them ahead of time and store them for snacking throughout the week.
→ What can I season them with besides garlic?
Feel free to experiment with different spices like curry powder, chili powder, or even cheese seasoning for a different flavor profile.
Garlic Roasted Chickpeas
Created by: Briony Ashcroft
Recipe Type: Natural Collection
Skill Level: Easy
Final Quantity: 4 servings
What You'll Need
Ingredients
- 2 cans (15 oz each) chickpeas, drained and rinsed
- 2 tablespoons olive oil
- 4 cloves garlic, minced
- 1 teaspoon paprika
- 1 teaspoon salt
- 1/2 teaspoon black pepper
- Pinch of cayenne pepper (optional)
How-To Steps
Preheat your oven to 400°F (200°C). Spread the rinsed chickpeas on a clean kitchen towel and pat them dry. It’s important to remove excess moisture for the best crunch.
In a mixing bowl, combine the dried chickpeas, olive oil, minced garlic, paprika, salt, black pepper, and cayenne pepper (if using). Toss well to ensure the chickpeas are evenly coated.
Spread the chickpeas on a baking sheet in a single layer. Roast in the preheated oven for 25-30 minutes, stirring halfway through, until they are golden brown and crunchy.
Once roasted, remove the chickpeas from the oven and let them cool for a few minutes. Enjoy as a snack or toss them on salads for added crunch!
Extra Tips
- For an extra burst of flavor, try using garlic powder along with minced garlic, or experiment with your favorite spices like cumin or rosemary.
Nutritional Breakdown (Per Serving)
- Calories: 150 kcal
- Total Fat: 7g
- Saturated Fat: 1g
- Cholesterol: 0mg
- Sodium: 200mg
- Total Carbohydrates: 20g
- Dietary Fiber: 5g
- Sugars: 1g
- Protein: 6g