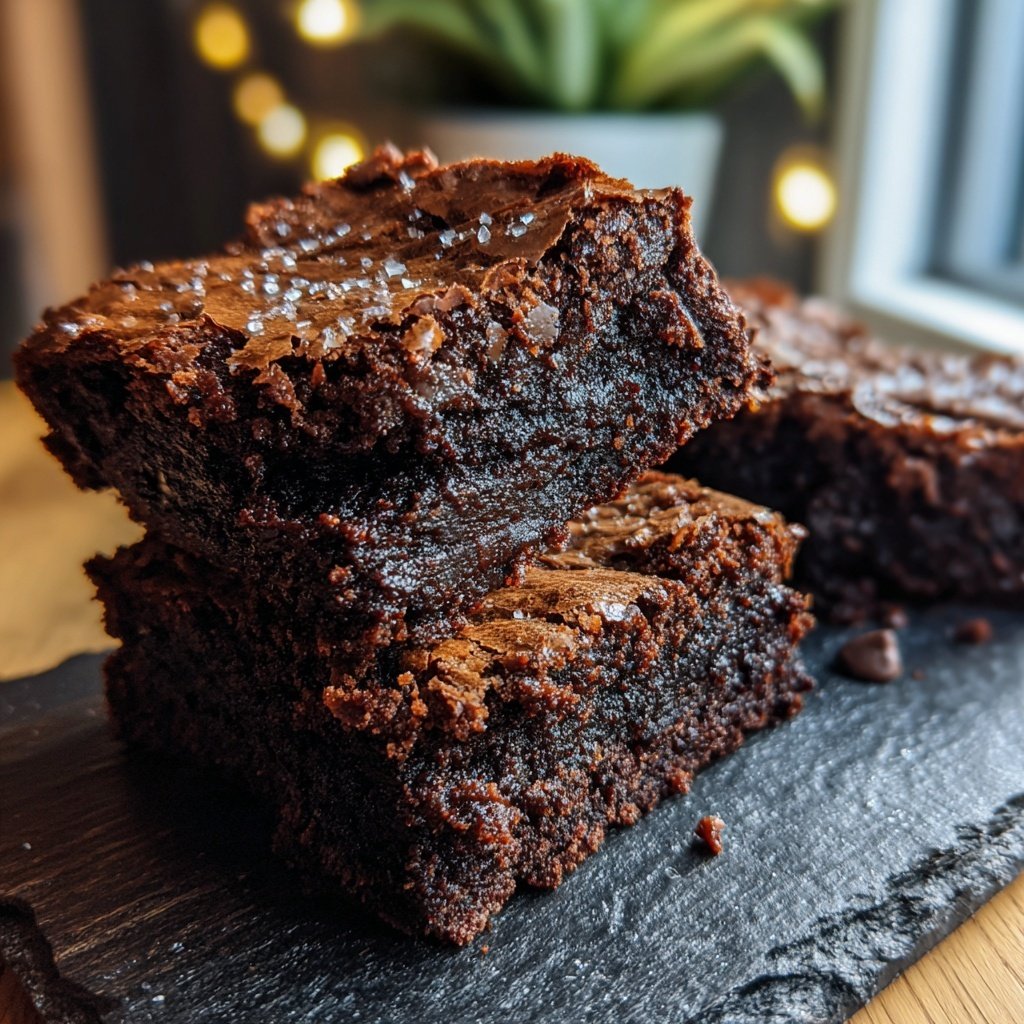
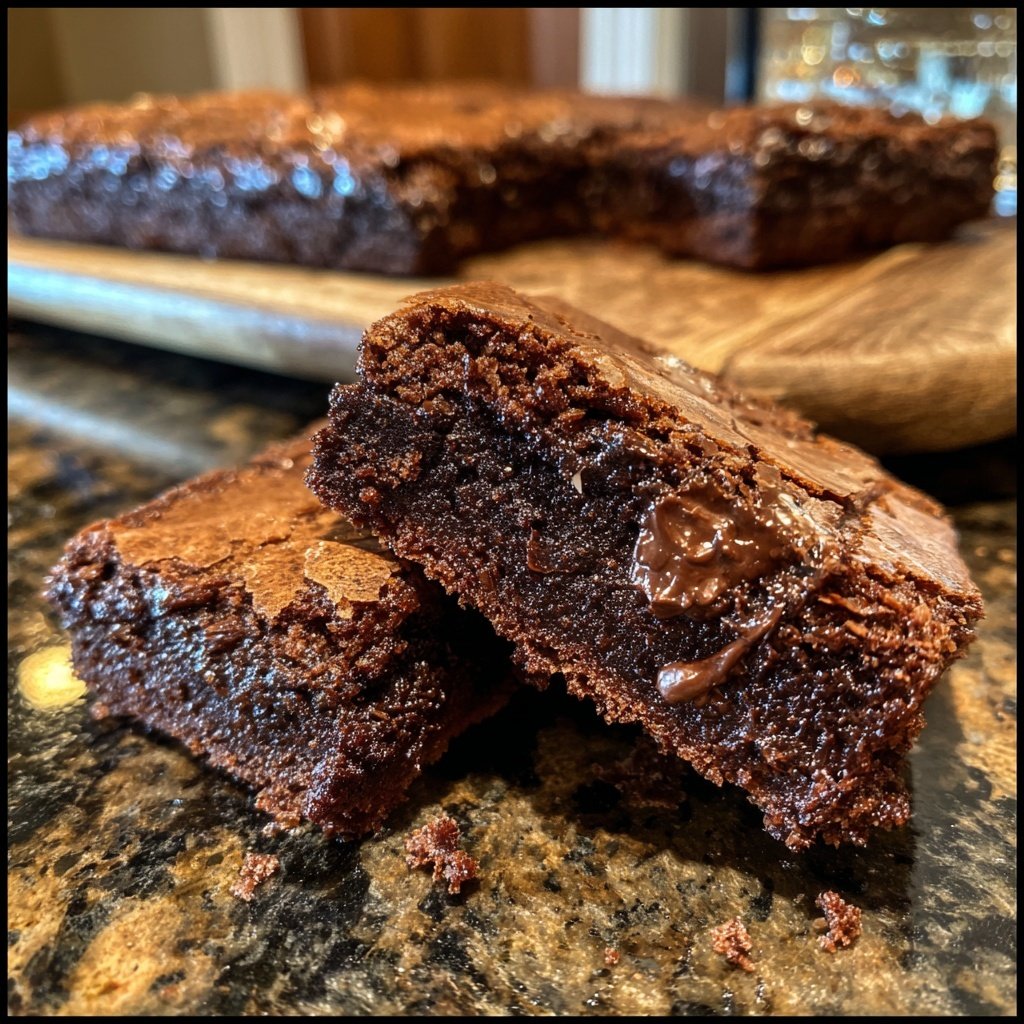
Sourdough Discard Brownies Crackly Top
Highlighted under: Soft Collection
I absolutely love baking with sourdough discard, and these brownies are one of my favorite ways to use it! With a rich chocolate flavor paired with a delightful crackly top, they offer a unique twist on classic brownies. The sourdough gives them a subtle depth of flavor that enhances the sweetness without being overpowering. Plus, they are incredibly easy to whip up, making them perfect for a last-minute treat or to impress friends and family. Trust me, once you try these, you'll be hooked on using your sourdough discard in desserts!
When I first experimented with sourdough discard in brownie recipes, I was surprised by how well it worked! The inclusion of the discard makes these brownies incredibly moist while contributing a slight tanginess that beautifully balances the sweetness of the chocolate. I also learned that the key to achieving that perfect crackly top is to mix the sugar and egg mixture vigorously before adding the dry ingredients.
After perfecting my recipe, I love serving these brownies warm, perhaps with a scoop of vanilla ice cream on top. They always disappear quickly at gatherings, and I enjoy seeing the surprise on everyone’s faces when I explain the sourdough twist. It makes for a fun conversation starter!
Why You'll Love These Brownies
- Rich chocolate flavor paired with tangy sourdough
- Delicious crackly top that adds texture
- Easy to make and perfect for using leftover sourdough discard
The Role of Sourdough Discard
Using sourdough discard in these brownies not only reduces waste but also adds a unique flavor profile. The natural acidity of the sourdough balances the sweetness of the sugar, making each bite more complex and satisfying. This tangy undertone contrasts beautifully with the rich chocolate, enhancing the overall taste experience. It’s a simple secret that elevates these brownies from ordinary to extraordinary.
Additionally, the moisture from the sourdough discard contributes to the fudgy texture, creating a delightful contrast to the crackly top. This is especially important for gluten-free adaptations or if you prefer a softer brownie. If you have extra sourdough discard on hand, the possibilities extend beyond brownies—consider incorporating it into pancakes or muffins for a similar depth of flavor.
Achieving the Perfect Crackly Top
The coveted crackly top is often seen in bakery-style brownies and is straightforward to achieve at home. The key lies in the mixing technique. When whisking the wet ingredients, aerate them well to introduce air, which helps form a beautiful top as they bake. You want to create a glossy mixture before adding the dry ingredients, which helps with the shiny finish post-baking.
Another tip is to bake at the right temperature. An oven that is too hot may cause the tops to crack prematurely without setting the interior. Make sure your oven is preheated to a consistent 350°F (175°C) for the best results. If you notice the tops aren’t crackly enough after baking, stick them back in for a couple of extra minutes, but keep a close eye to avoid overcooking.
Ingredients
Gather these ingredients to get started:
Brownies
- 1 cup sourdough discard
- 1/2 cup unsalted butter, melted
- 1 cup granulated sugar
- 2 large eggs
- 1 tsp vanilla extract
- 1/3 cup unsweetened cocoa powder
- 1 cup all-purpose flour
- 1/4 tsp salt
- 1/2 cup chocolate chips (optional)
Now that you have everything ready, let's move on to the steps!
Instructions
Follow these simple steps to make your brownies:
Preheat the Oven
Preheat your oven to 350°F (175°C) and grease a 9x9-inch baking pan or line it with parchment paper.
Mix Wet Ingredients
In a large mixing bowl, combine the melted butter, sugar, eggs, and vanilla extract. Whisk until well combined and smooth.
Incorporate Sourdough Discard
Add the sourdough discard to the wet mixture and stir until fully integrated.
Combine Dry Ingredients
In another bowl, whisk together the cocoa powder, flour, and salt. Gradually fold the dry ingredients into the wet mixture until just combined. Do not overmix.
Add Chocolate Chips
If desired, fold in the chocolate chips for an extra chocolatey treat.
Bake the Brownies
Pour the brownie batter into the prepared pan and spread evenly. Bake for 25 minutes, or until a toothpick inserted comes out with a few moist crumbs.
Cool and Serve
Let the brownies cool in the pan for about 10 minutes before transferring them to a wire rack. Once cooled, cut into squares and enjoy!
Your brownies are ready to be devoured!
Pro Tips
- For an added flavor twist, sprinkle some sea salt on top before baking, or try adding nuts for extra crunch. If you want an even fudgier texture, reduce the flour by a couple of tablespoons.
Storing and Freezing Brownies
These brownies can be stored at room temperature in an airtight container for up to four days. If you want to keep them longer, consider freezing them. Cut the brownies into squares, layer them with parchment paper to prevent sticking, and place them in a freezer-safe container. They can be frozen for up to three months, and you can thaw them overnight in the refrigerator for a delightful treat anytime.
When reheating, a quick 10-15 second zap in the microwave will warm them up wonderfully. If you prefer a freshly baked feel, you can also reheat them in a preheated oven at 350°F (175°C) for about 5-7 minutes. This not only warms them through but can help re-crisp the edges if they have softened in storage.
Delicious Variations
While the original recipe is fantastic as is, there are countless ways to customize your brownies. Consider adding nuts like walnuts or pecans for a crunchy texture. You can also experiment with flavors by mixing in peppermint extract or orange zest for a refreshing twist. For a richer taste, try using dark chocolate chips instead of semi-sweet; this results in an even deeper chocolate flavor.
If you want to go gluten-free, simply swap the all-purpose flour for a 1:1 gluten-free baking flour blend. Just be mindful that gluten-free flours can sometimes lead to a denser texture, so you might want to add a tablespoon or two of milk or water to maintain moisture.
Questions About Recipes
→ Can I use active sourdough starter instead of discard?
Yes, you can use active sourdough starter, but reduce the other liquids in the recipe slightly to maintain the correct consistency.
→ How should I store the brownies?
Store the brownies in an airtight container at room temperature for up to 3 days, or refrigerate for up to a week.
→ Can I freeze these brownies?
Absolutely! Wrap individual brownies tightly in plastic wrap and freeze them for up to 3 months. Thaw at room temperature before enjoying.
→ How do I know when the brownies are done baking?
The brownies are done when the edges look set and a toothpick inserted in the center comes out with a few moist crumbs, not wet batter.
Sourdough Discard Brownies Crackly Top
Created by: Briony Ashcroft
Recipe Type: Soft Collection
Skill Level: Easy
Final Quantity: 12 brownies
What You'll Need
Brownies
- 1 cup sourdough discard
- 1/2 cup unsalted butter, melted
- 1 cup granulated sugar
- 2 large eggs
- 1 tsp vanilla extract
- 1/3 cup unsweetened cocoa powder
- 1 cup all-purpose flour
- 1/4 tsp salt
- 1/2 cup chocolate chips (optional)
How-To Steps
Preheat your oven to 350°F (175°C) and grease a 9x9-inch baking pan or line it with parchment paper.
In a large mixing bowl, combine the melted butter, sugar, eggs, and vanilla extract. Whisk until well combined and smooth.
Add the sourdough discard to the wet mixture and stir until fully integrated.
In another bowl, whisk together the cocoa powder, flour, and salt. Gradually fold the dry ingredients into the wet mixture until just combined. Do not overmix.
If desired, fold in the chocolate chips for an extra chocolatey treat.
Pour the brownie batter into the prepared pan and spread evenly. Bake for 25 minutes, or until a toothpick inserted comes out with a few moist crumbs.
Let the brownies cool in the pan for about 10 minutes before transferring them to a wire rack. Once cooled, cut into squares and enjoy!
Extra Tips
- For an added flavor twist, sprinkle some sea salt on top before baking, or try adding nuts for extra crunch. If you want an even fudgier texture, reduce the flour by a couple of tablespoons.
Nutritional Breakdown (Per Serving)
- Calories: 250 kcal
- Total Fat: 12g
- Saturated Fat: 7g
- Cholesterol: 60mg
- Sodium: 90mg
- Total Carbohydrates: 30g
- Dietary Fiber: 1g
- Sugars: 20g
- Protein: 3g